when I made my quarantine log cabin quilt, there was a LOT of information about all the choices in that quilt. Having piled so much meaning into the fabric choices in my quarantine log cabin quilt, and having written about each block as I made it, it seemed like all those words needed to be recorded on the quilt label...
Batik, C’est Chic
I’ve blogged about this book before, but it is coming up again, because I’ve got to say how much fun I have just keeping that electric fry pan of wax around and pulling it out on a random evening when I’ve got a free hour and a bell pepper.
Since I don’t dye too often in the winter, I’ve got a fair amount of waxed fabric in a box under my bed, just waiting to be dyed.
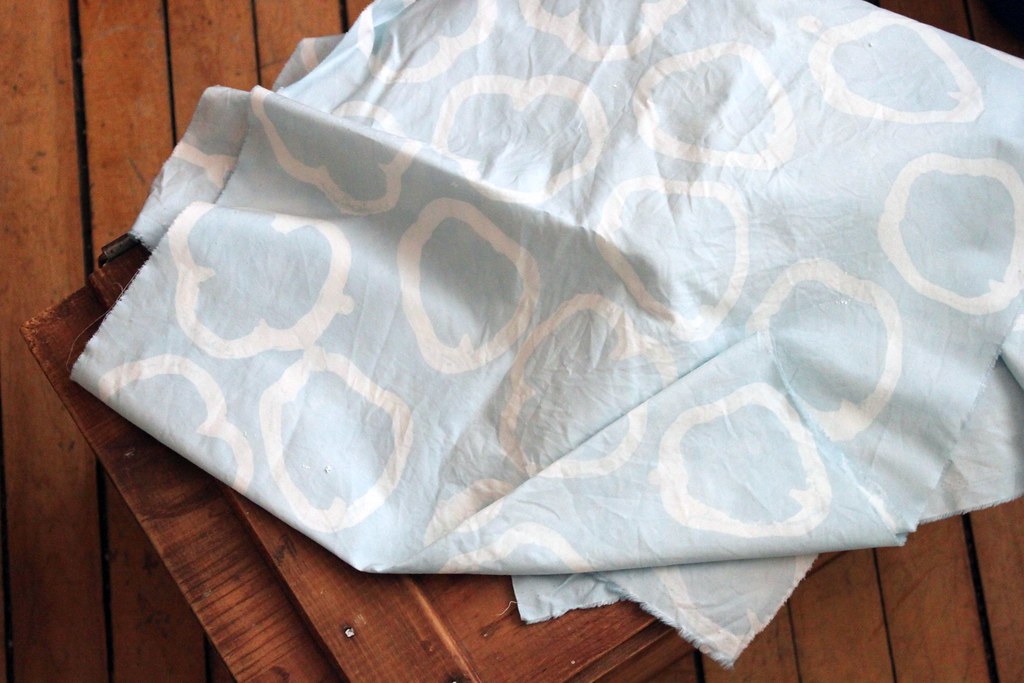
When I made the light blue dye bath for my soccer jersey, I went through the box to see if any of the waiting fabric would be pleasing in blue.
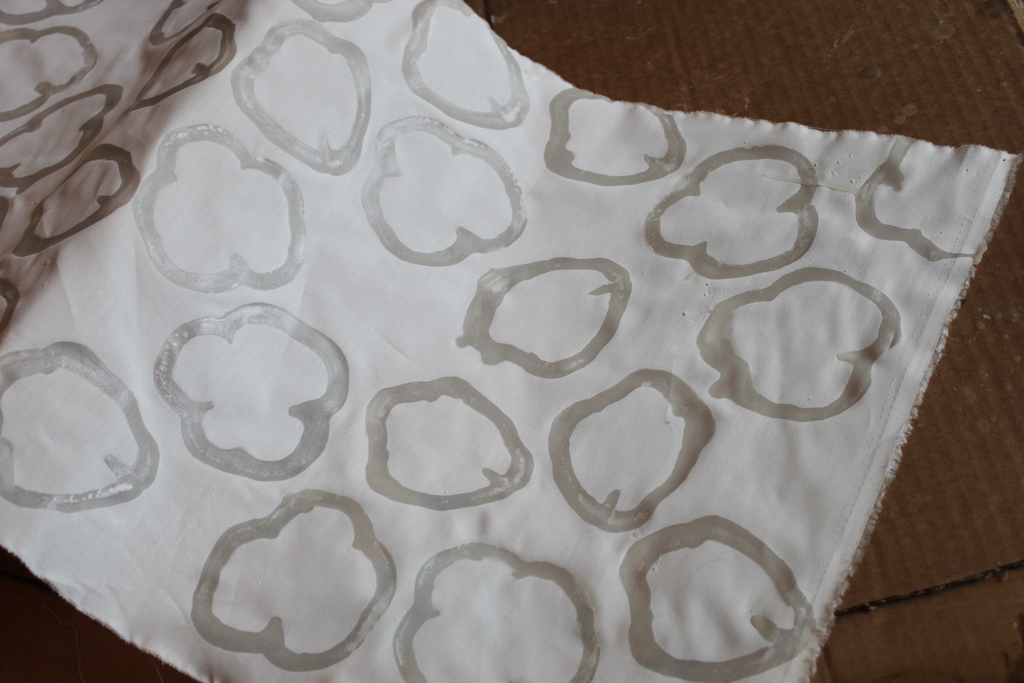
I found this one, which was made using the aforementioned bell pepper:

Looks good all dyed up, no?
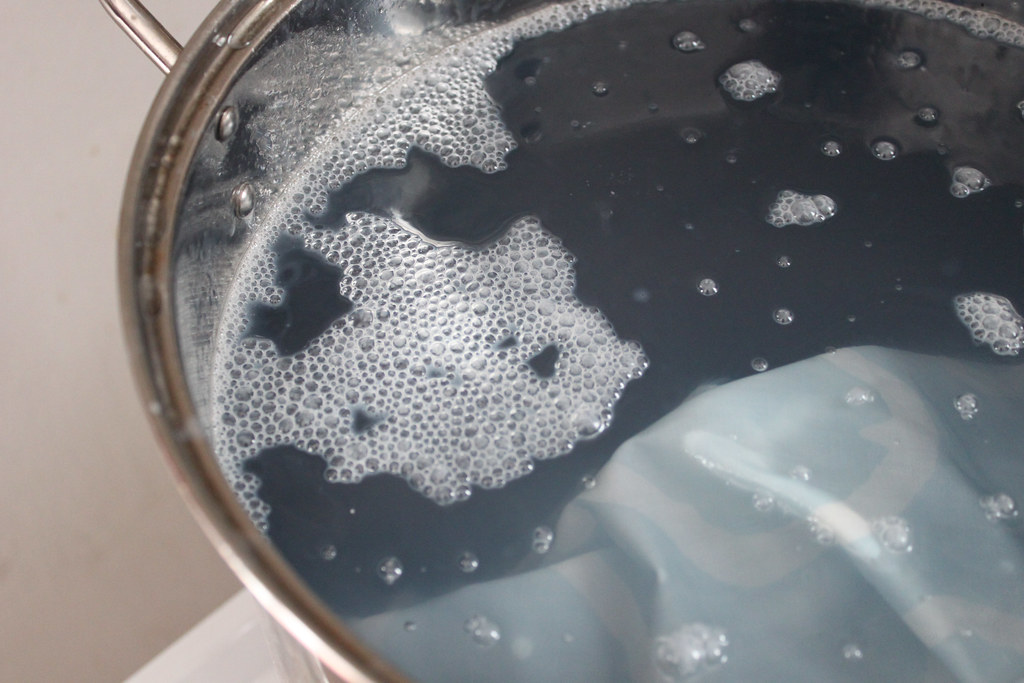
If you look back at my older posts about batik, you’ll see that the problem I had when following the directions in Malka’s book was some missing details in the explanation of removing the wax from the fabric. Basically, this is what I learned last time (which Malka confirmed in the comments to an earlier blog post): don’t try to boil out more than a yard of fabric at a time.
I have discovered another useful tip which really minimizes the work involved in removing the wax: as the wax boils off the fabric, scoop it out of the pot.
Those bubbles on the surface are wax.
Scoop the wax.
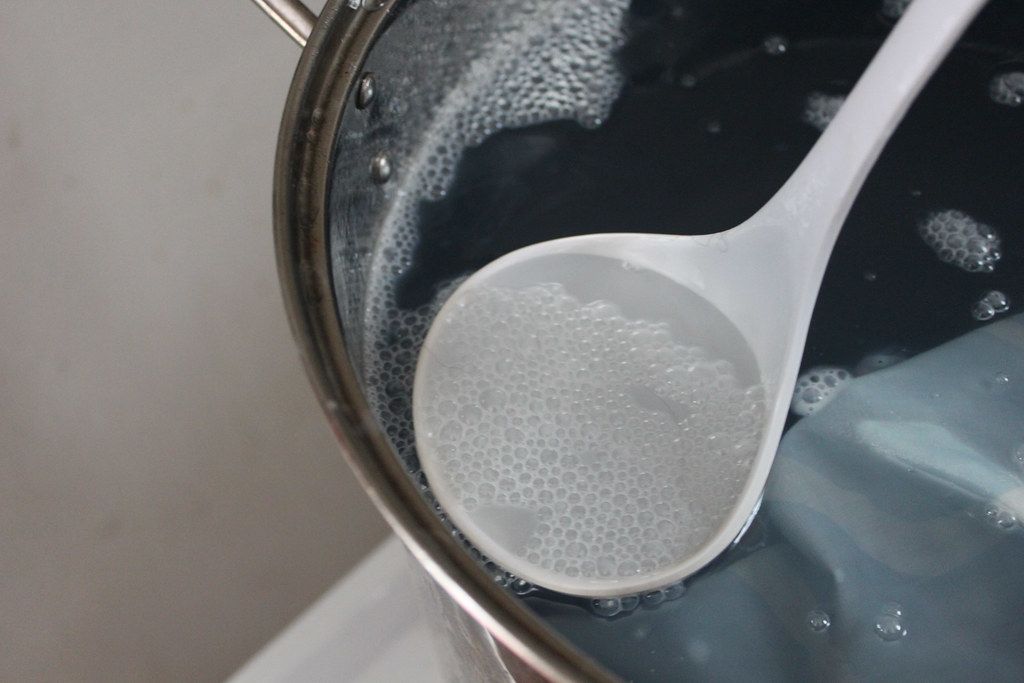
Have a bucket of cold water handy and put the hot water and wax you’ve just scooped into the bucket.
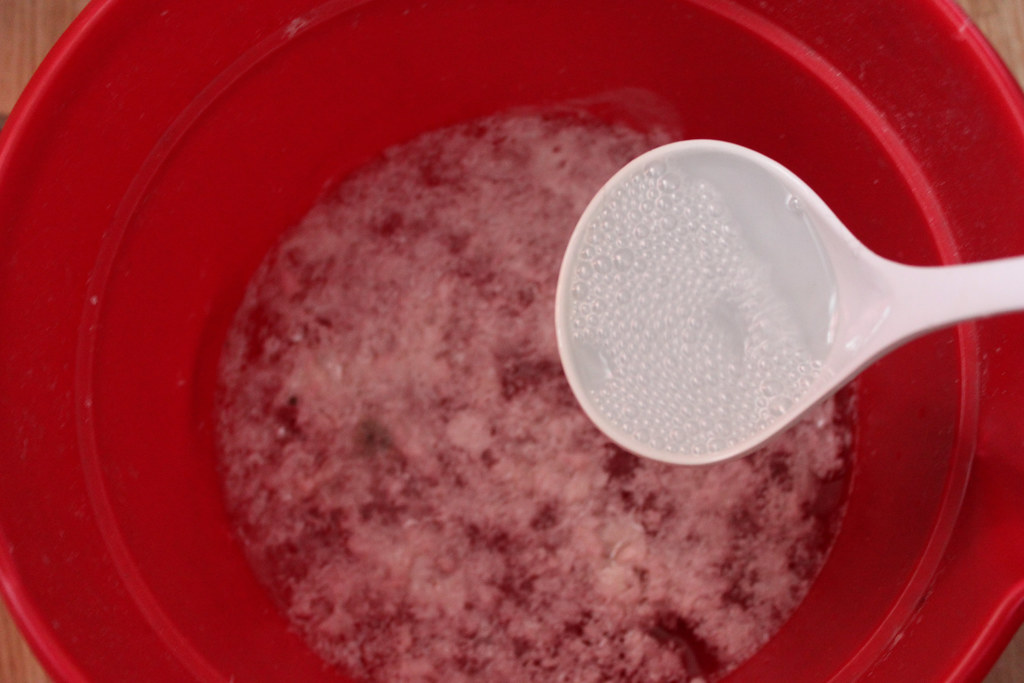
As you can see, this removes a lot of the wax from the pot! It’s kind of fun to watch it solidify as it hits the cold water. You don’t have to watch the pot and scoop the wax continuously, a few times over the course of the boiling will do it.
Doing this made the post-pot wax removal time about 10-seconds long. I just had to rinse the fabric and massage it to verify that all the wax had been removed (it had!) Hooray!
Only drawback: my soup ladle is no longer safe for food…oh well, nothing a trip to the shops won’t fix!

Related Posts
This Post Has 9 Comments
Comments are closed.
the light blue fabric came out beautifully. the pepper shapes look like clouds.
I LOVE this! I'm generally not a fan of batiks, but I never realized you could use the same process to make such clean, simple, gorgeous fabric. I'll definitely be looking into this book soon. Thanks!
Oh the fun I'd have if I didn't have a toddler! 🙂 Thanks for sharing with us!
Oh, very cool! Love the shape variations from the pepper!
That came out beautifully! I am itching to do some dying. That book is definitely on my to-purchase list.
I love the fabric! And these are wonderful tips. I also love the soccer jersey you made – so cool when you can just do it yourself!
humm, the class I took awhile back, had us iron out the extra wax. then just crack the extra wax on the piece of cotton used in either the garbage or back in the wax container. (in my class it was an electric pan (not for food).
Rossie, I took Malka's workshop at Quiltcon a couple years ago.
I found the ABSOLUTE BEST way to take out the wax is boil around a metre (or yard) at a time in a big pot for at least 30 minutes after it comes to a boil. Stir every once in a while to re-position the cloth. Then weigh the fabric down to the bottom of the pot with your tongs or a stone and let it cool for 3 or 4 hours (over night). The wax will all solidify on the top and you can rinse it off and re-melt it and use it again. The fabric will be wax free with just a few blobs in the folds that are big enough to pick off. If you try to pull the fabric out of a hot pot, that's been skimmed, you still get a bunch of wax from the surface re-attaching it'self.
As for using already printed fabric, I found that starting with Kona solids, I just can't get all the wax out. Even if you boil it a couple times, it's still stiff in the end. Prints seem to work better and the wax generally come out OK. I actually like the Kona PFD (prepared for dying) better than Pima Cotton. Wax boils out of the Kona PFD better.
And for brushes, I found some Japanese Hake (looks like these – http://www.gdfa.net/special_shellac.html) brushes that take a while to heat up when you first put them in the hot wax, but they hold a lot of wax and keep it warm. You can pretty much draw an 18 inch line with each stroke. I use the 1 inch wide brush sideways to get a nice 1/4 inch line.
Paul
Thank you so much for these truly useful notes and tips! I'm hoping to get back to dying in the spring and this will be a real time-saver!