I'm really pumped to be teaching at Quilt Con in February! SOFT CRITICISM - space…

Done enough to get things done.
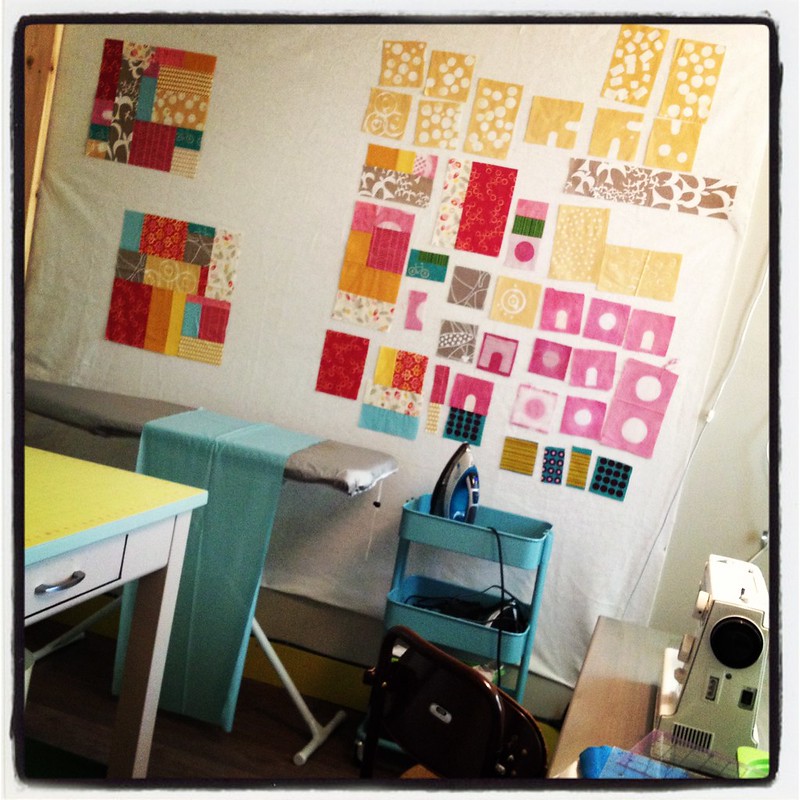
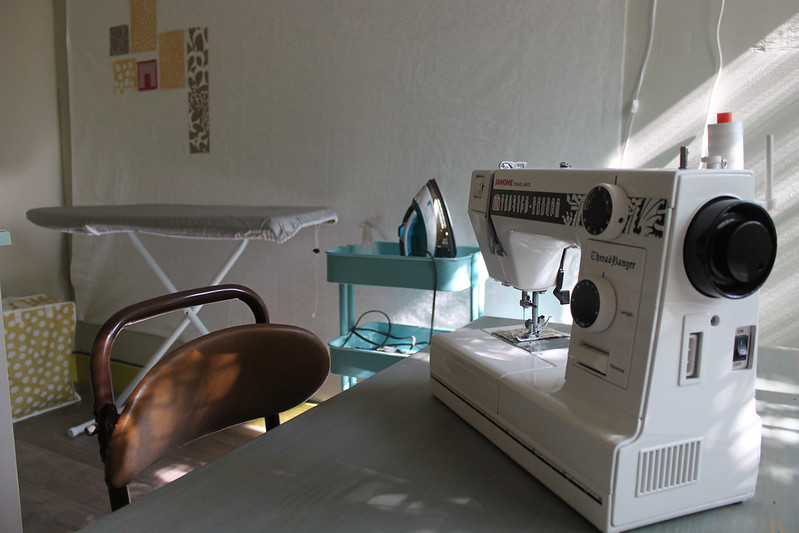
The studio is not complete. There are two more pieces of furniture to move, four bare walls to fill, and more. But, after a fair amount of work, yesterday I reached the point where I decided not to work on my studio, but in it! I think the tipping point was hanging up the design wall.
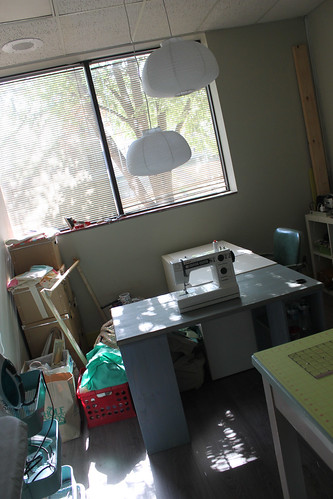
But, I’m getting ahead of myself here. When I last left off, the studio looked like this:
So, the first thing that happened was to tear out the carpet and see what was under it.
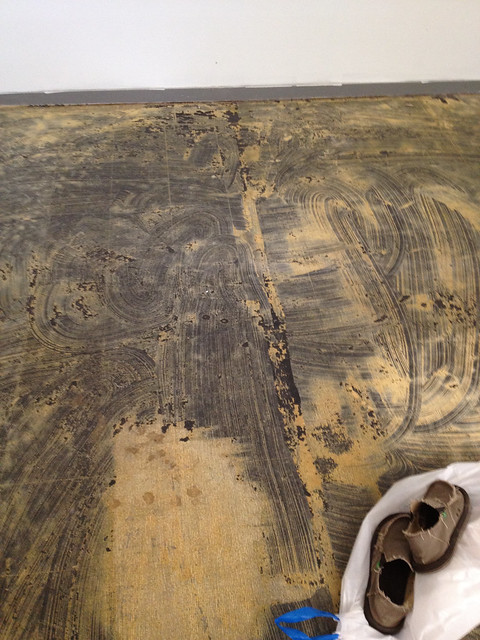
I had been hoping for cement, which could be painted or stained. And indeed, that is cement under those tiley-things-covered-in-adhesive, but I have my guesses that those tiles contain asbestos, so I didn’t want to disturb them. Which meant it was time for me to get serious about shopping for other flooring options.
I ended us with this laminate from Lumber Liquidators:
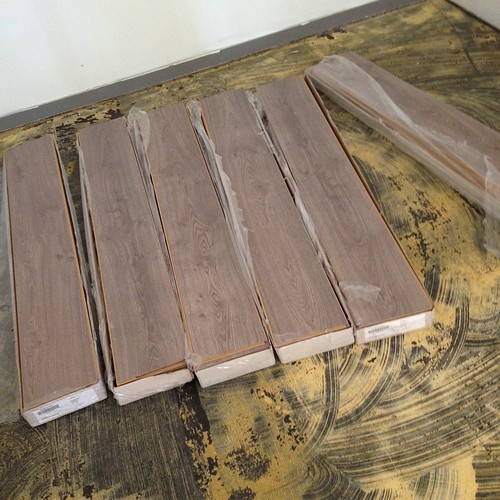
It was $75 for the room (145 square feet).
I purchased the pad and sheeting at Ikea for $40.
I picked this laminate because I love the color and because it was so super-cheap! Now, I would not put this floor in my house. Because you get what you pay for, and this floor was insanely tricky to install because the tongue-and-groove bits were flimsy and fragile. Also, this floor is easy to damage–I’ve already chipped it! Cheap is not just a price. It has a 5-year warranty…most floors come with a 50+ year warranty. I figure this is part of the charm of having a studio. It’s not supposed to be perfect, it is supposed to be functional!
If you’ve ever installed hard-wood or laminate floors, you know that you’re supposed to leave the flooring in the room for a few days before installing it so that it can acclimate. So after I ordered the floor, waited for it to arrive, picked it up, and plunked it in the room, I took those few days to paint the walls.
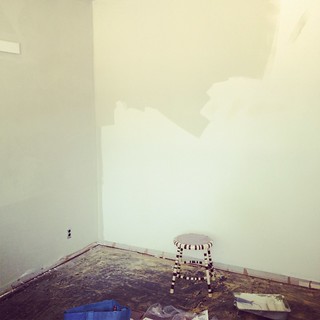
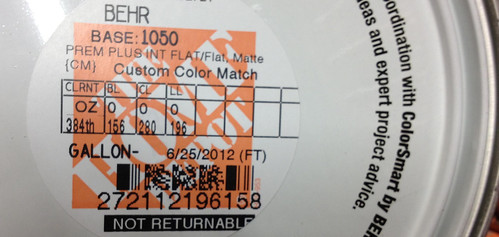
This color is a “match” to my guest room at home. I just love its soothing gray-with-a-light-touch-of-greenness. Here’s the formula in case you want to try this at home (it is such a lovely color.)
For molding around the room, I bought the flattest fence pickets I could find, sanded them, painted them yellow, and slapped them against the wall. That yellow is Behr’s “Sea Kelp” and I already owned a gallon of it from an old project. I used pickets because they are cheap and molding is pricey. And I refuse to put $100 of molding around a $75 floor. Also, in the end, I love the look:
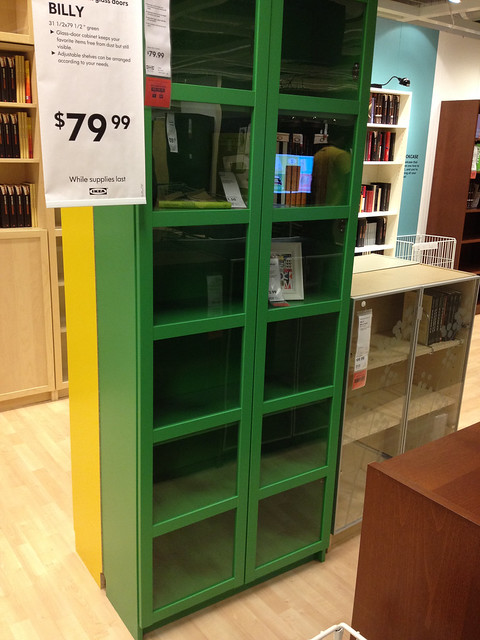
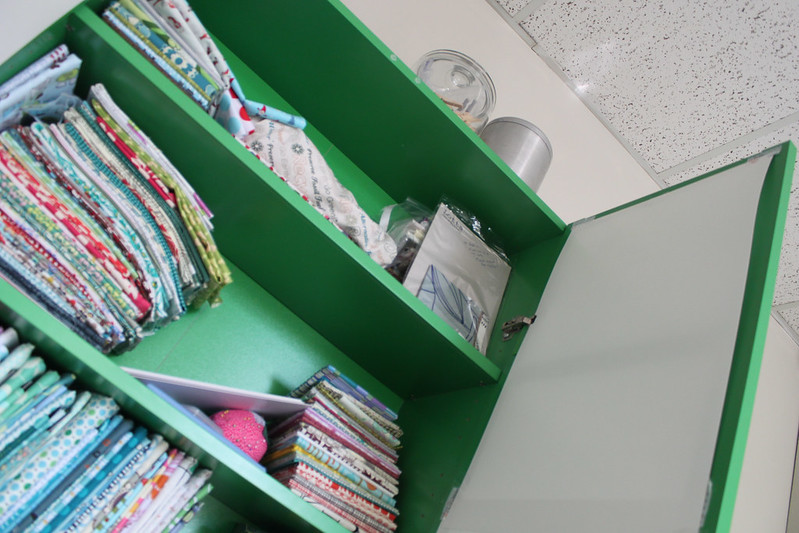
The only major purchase I’ve made for this room has been a big bookcase for fabric storage. The studio doesn’t have a closet, which is where I’ve been keeping my fabric.
This is a Billy bookcase from Ikea. It was limited edition and on sale. (The green is now gone from the Michigan store, I think the yellow peaking out from behind is still there).
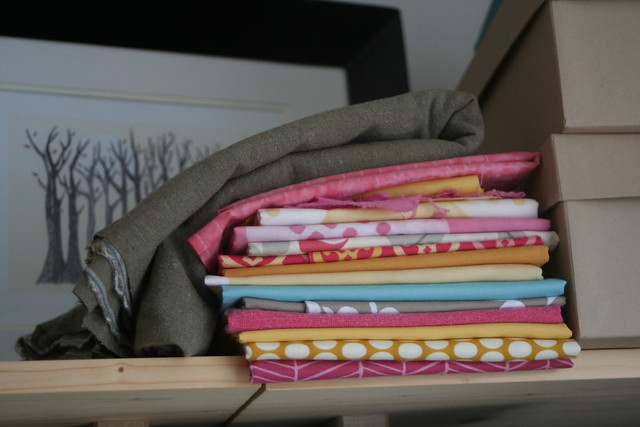
I’ve been mini-bolting my stash following a process similar to this mini-bolt tutorial except leaving some board sticking out the bottom to reduce wear (I tend to pull my fabric out and rearrange it a lot).
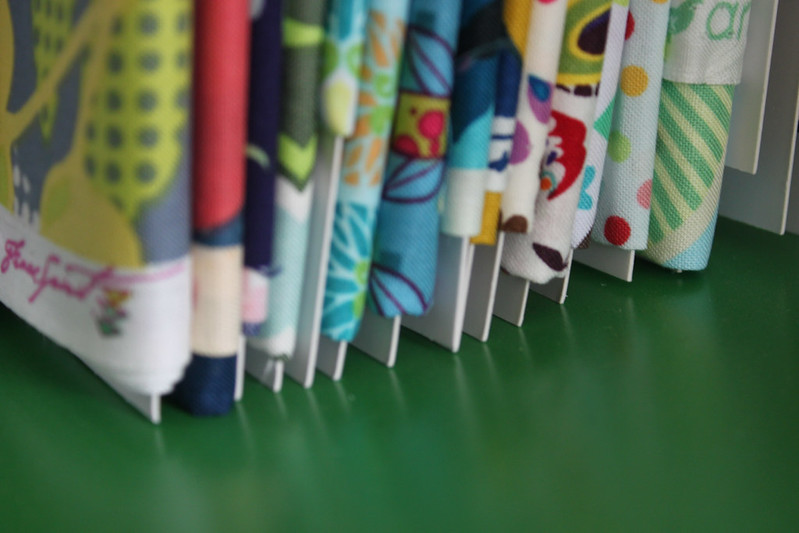
I’ve lined the glass doors with white posterboard. I’m going to switch it for something more stylish before too long, but I wanted to line the glass quickly to prevent the sun from bleaching my fabrics.
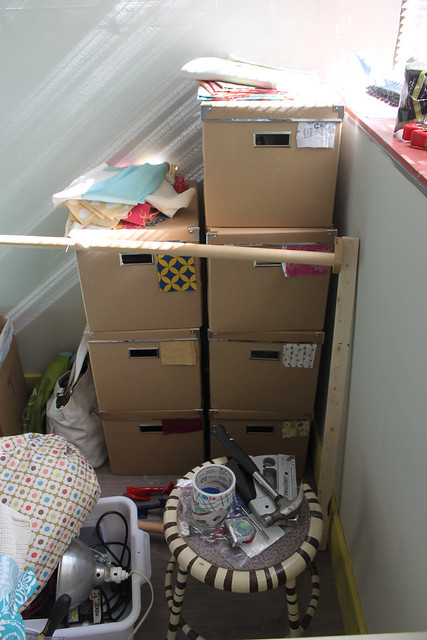
I have one little corner of chaos in the studio. To the left in this photo:
I’m going to be bringing in a bookshelf and another table from my apartment pretty soon, which will help to get this in order. As will finishing up with the tools and taking them home.
But, I wanted to show you the boxes. Those boxes all contain works in progress. The little slip of fabric hanging out lets me know what is in which box.
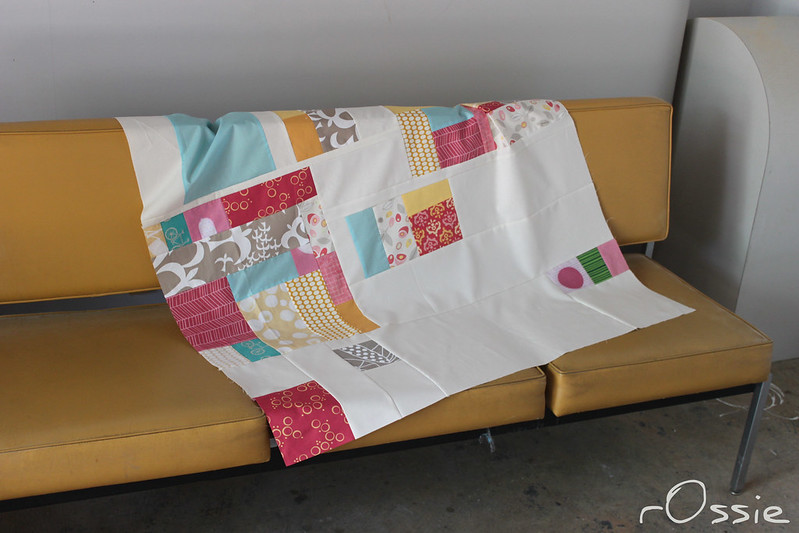
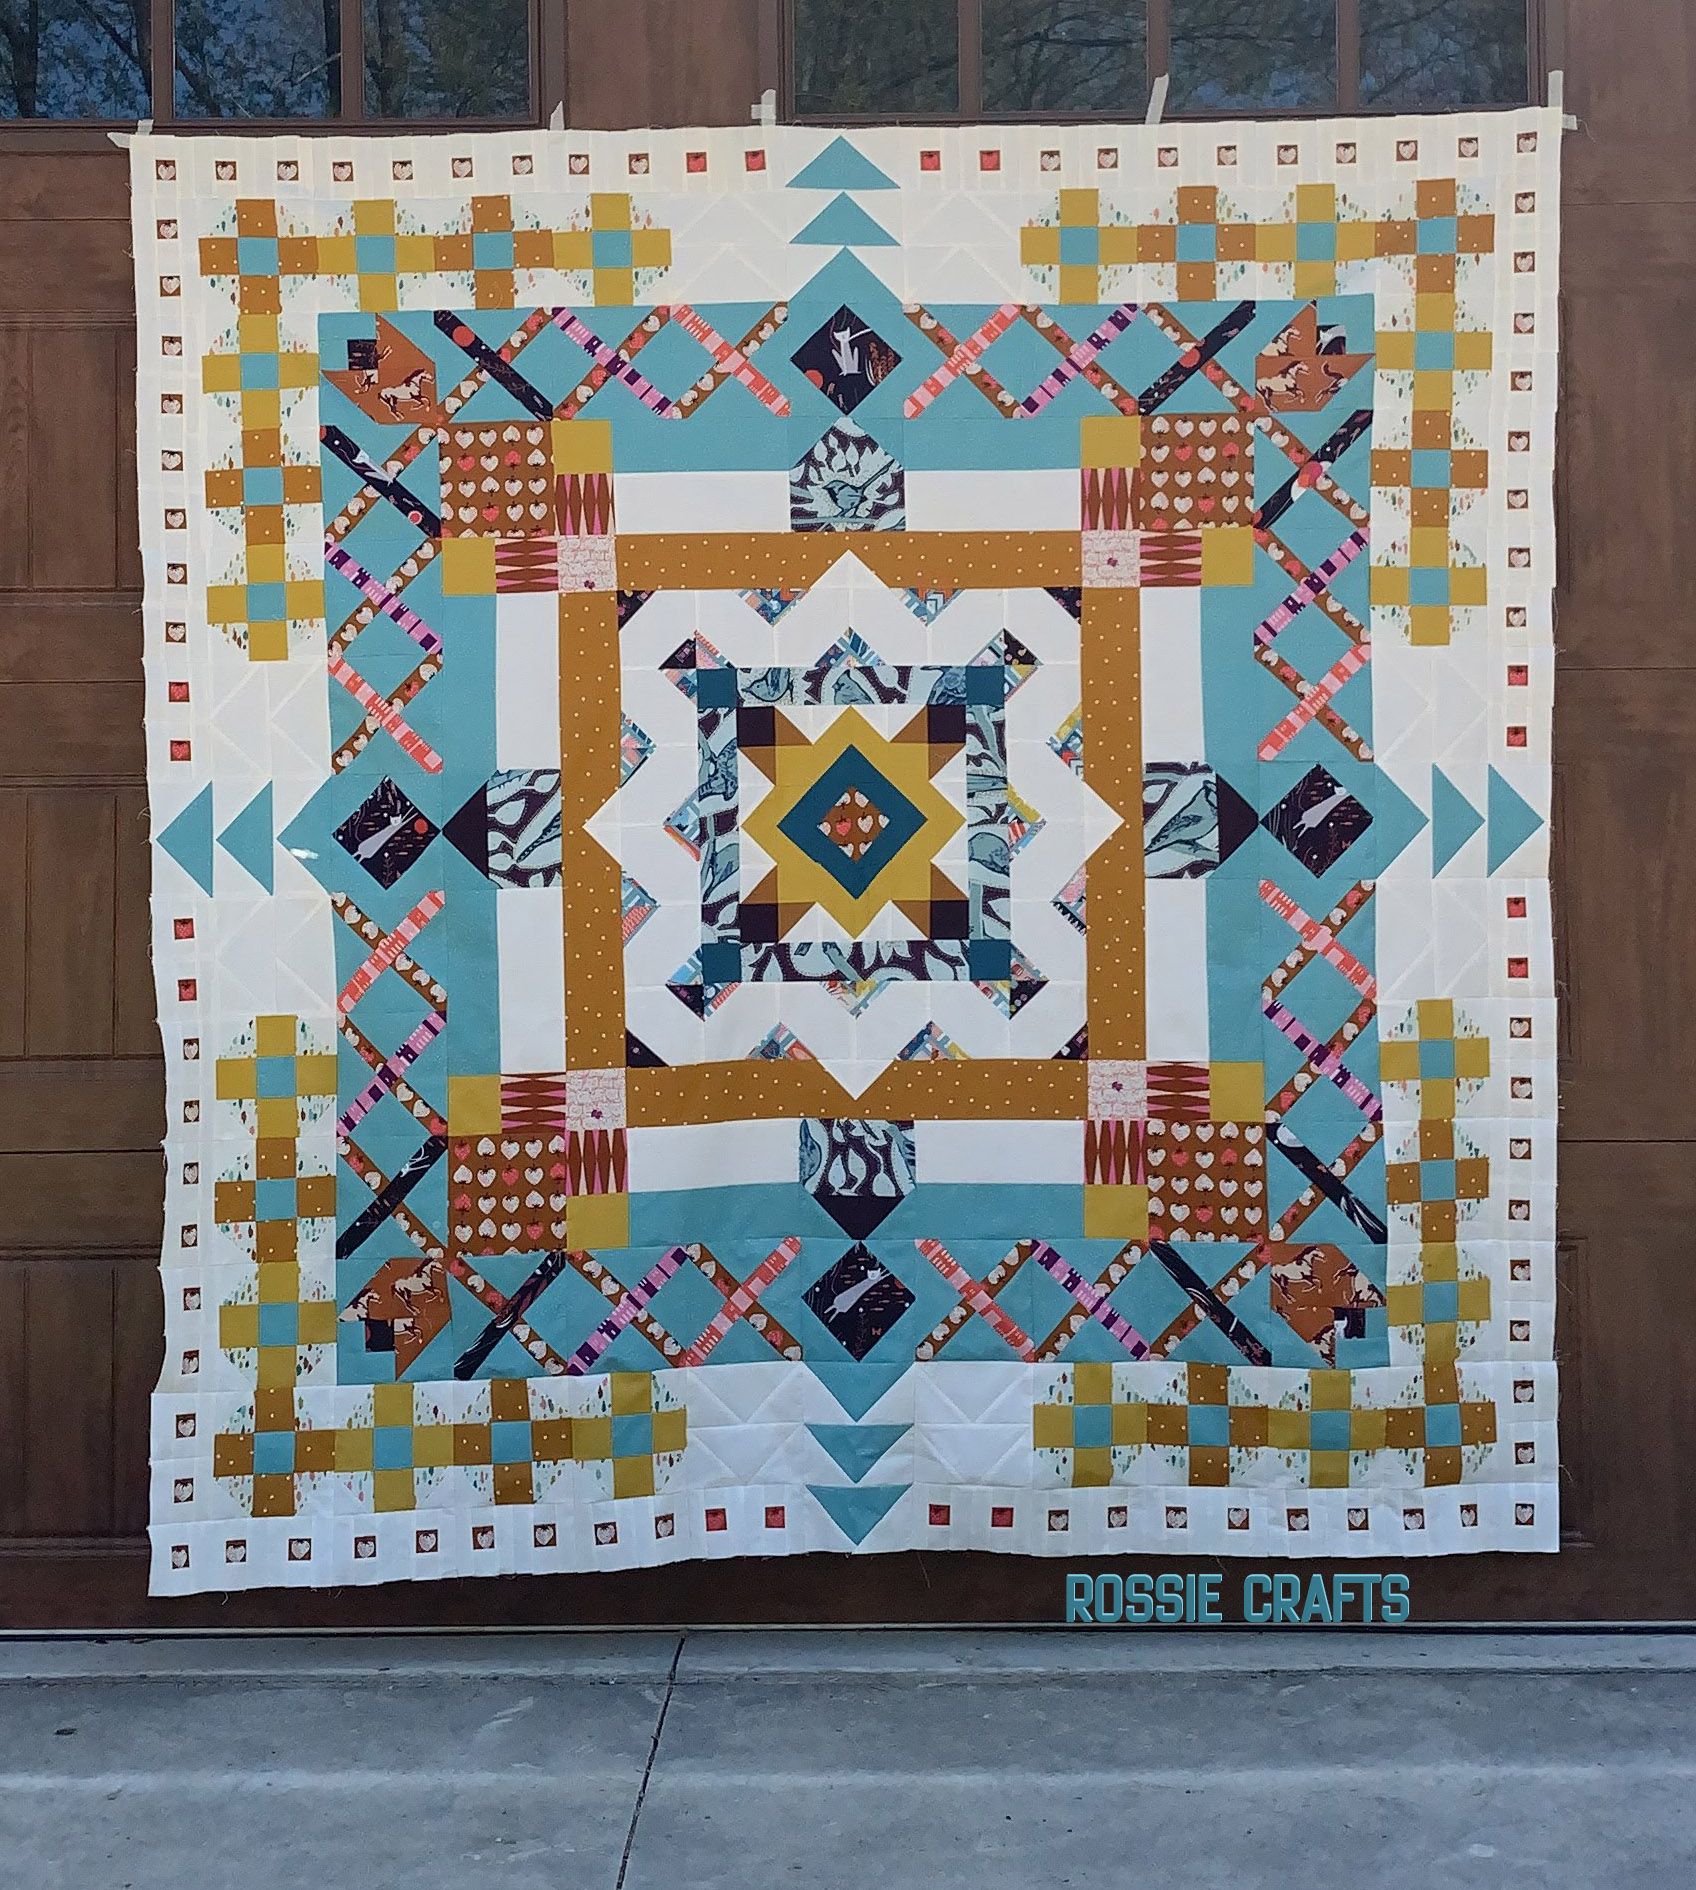
Yesterday, after I stapled my design wall up, I decided to put one of those works in progress onto the wall… and then I could help but fiddle with it…which led to sewing… and then I had this!
Yay!
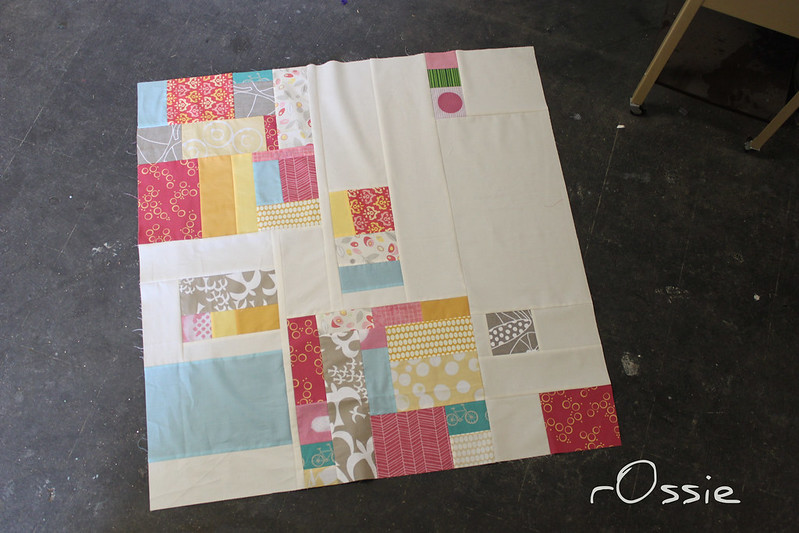
By the way, how crazy is it that this old work in progress (Flickr tells me this photo if from March 2010)
is such a great match with this brand new print from Tula Pink?
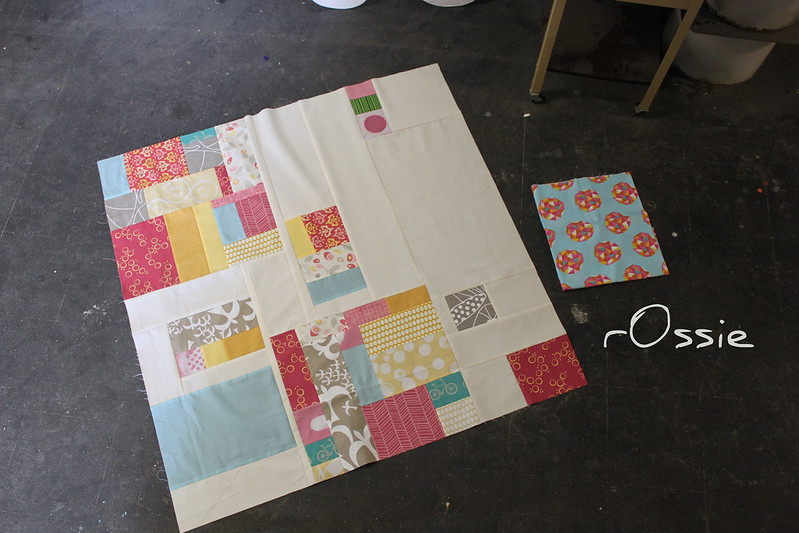
I think I’m going to have to use the Tula Pink meteors as binding (and maybe backing) and perhaps even churn out another quilt with many of the same fabrics and add in that Tula print!
I love this studio!
Related Posts

This Post Has 15 Comments
Comments are closed.
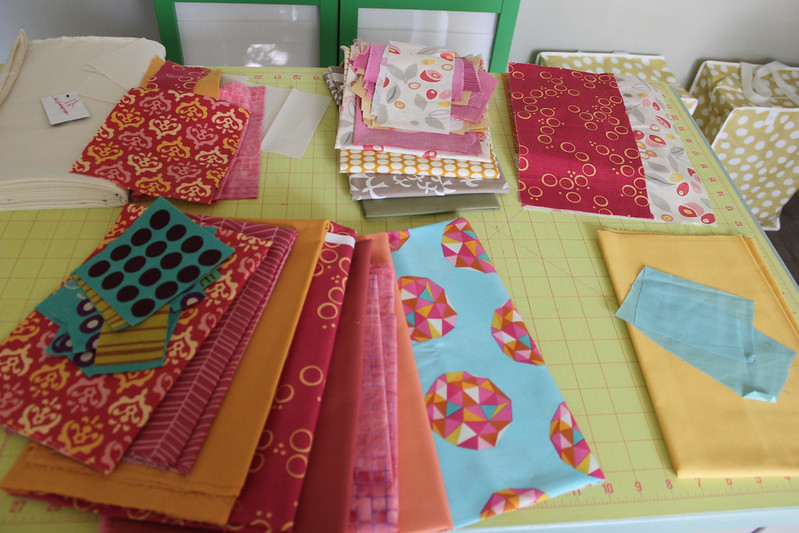
Love the Curry and Catsup Quilt – and the name! Whose print is the one with circles on it? Your studio is looking great!
The dark pink one in the lower left? Not sure. I will check tomorrow if I have selvedge information.
Yes – the dark pink with yellow/gold circles on it. Thanks for checking!
The selvedge says "Faye Burgos for MARCUS Fabrics." Good luck!
Thank you so much!!!
What a cool looking studio so far! How cool to have your design wall up and a few of the necessary elements placed in!
Loving that quilt, is the pattern your own? =D
It was improvisationally pieced…no pattern!
glad you love your studio! It looks great so far. isn't fun to put together a room that's JUST for you? i love mine too. i call it my "happy place".
It's great! i also love that this room is for very few purposes…just the etsy shop and the quilt making!
So excited for you!
Thank you!
oh that IKEA thing your iron is on! I want one… I have no use for it but still 🙂 I bet you can't wait to quilt that! So many great quilting opportunities Its gonna be lovely! nice job!
Yes, it will be fun to quilt!
The raskog trolley is awesome…I had to stalk it online and then run to ikea as soon as it came in!
Thank you for showing an "in progress" quilting/crafting room, it is so inspiring!!
[…] is the Curry and Catsup quilt which has appeared on the blog before in this post and this post. Sorry for the bad lighting in the above photo. The ones from the earlier […]