
Shibori Itajime Quilt
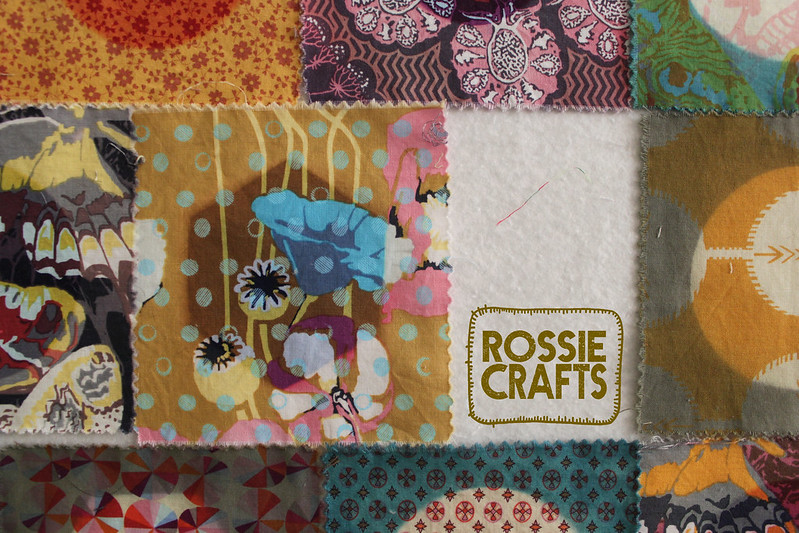
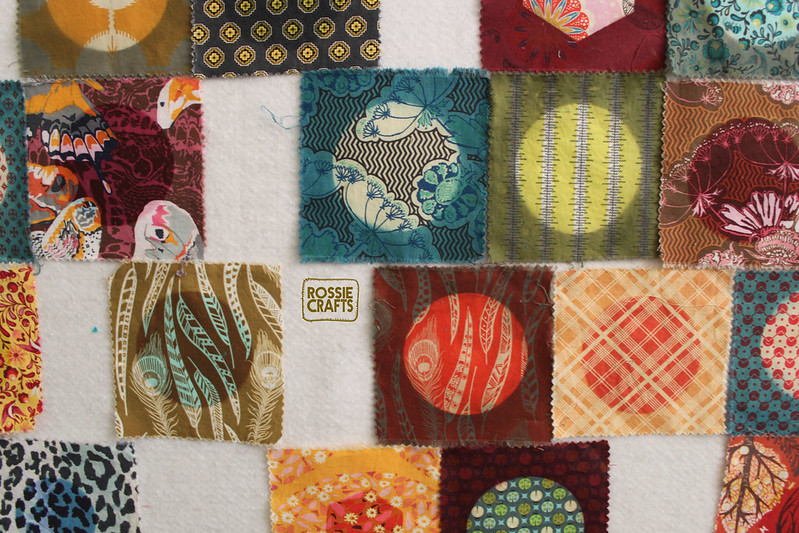
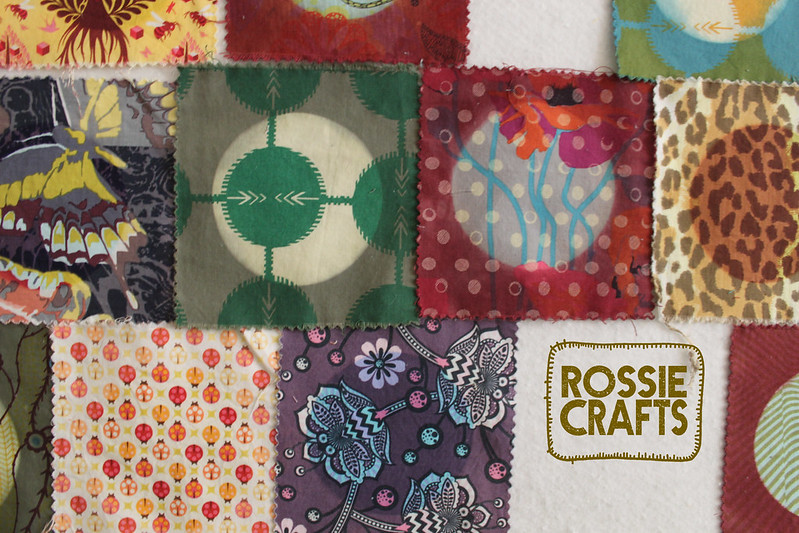
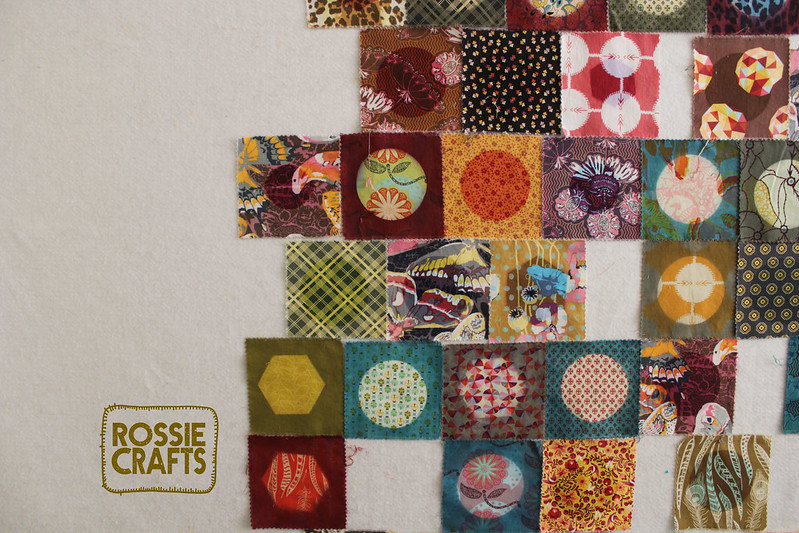
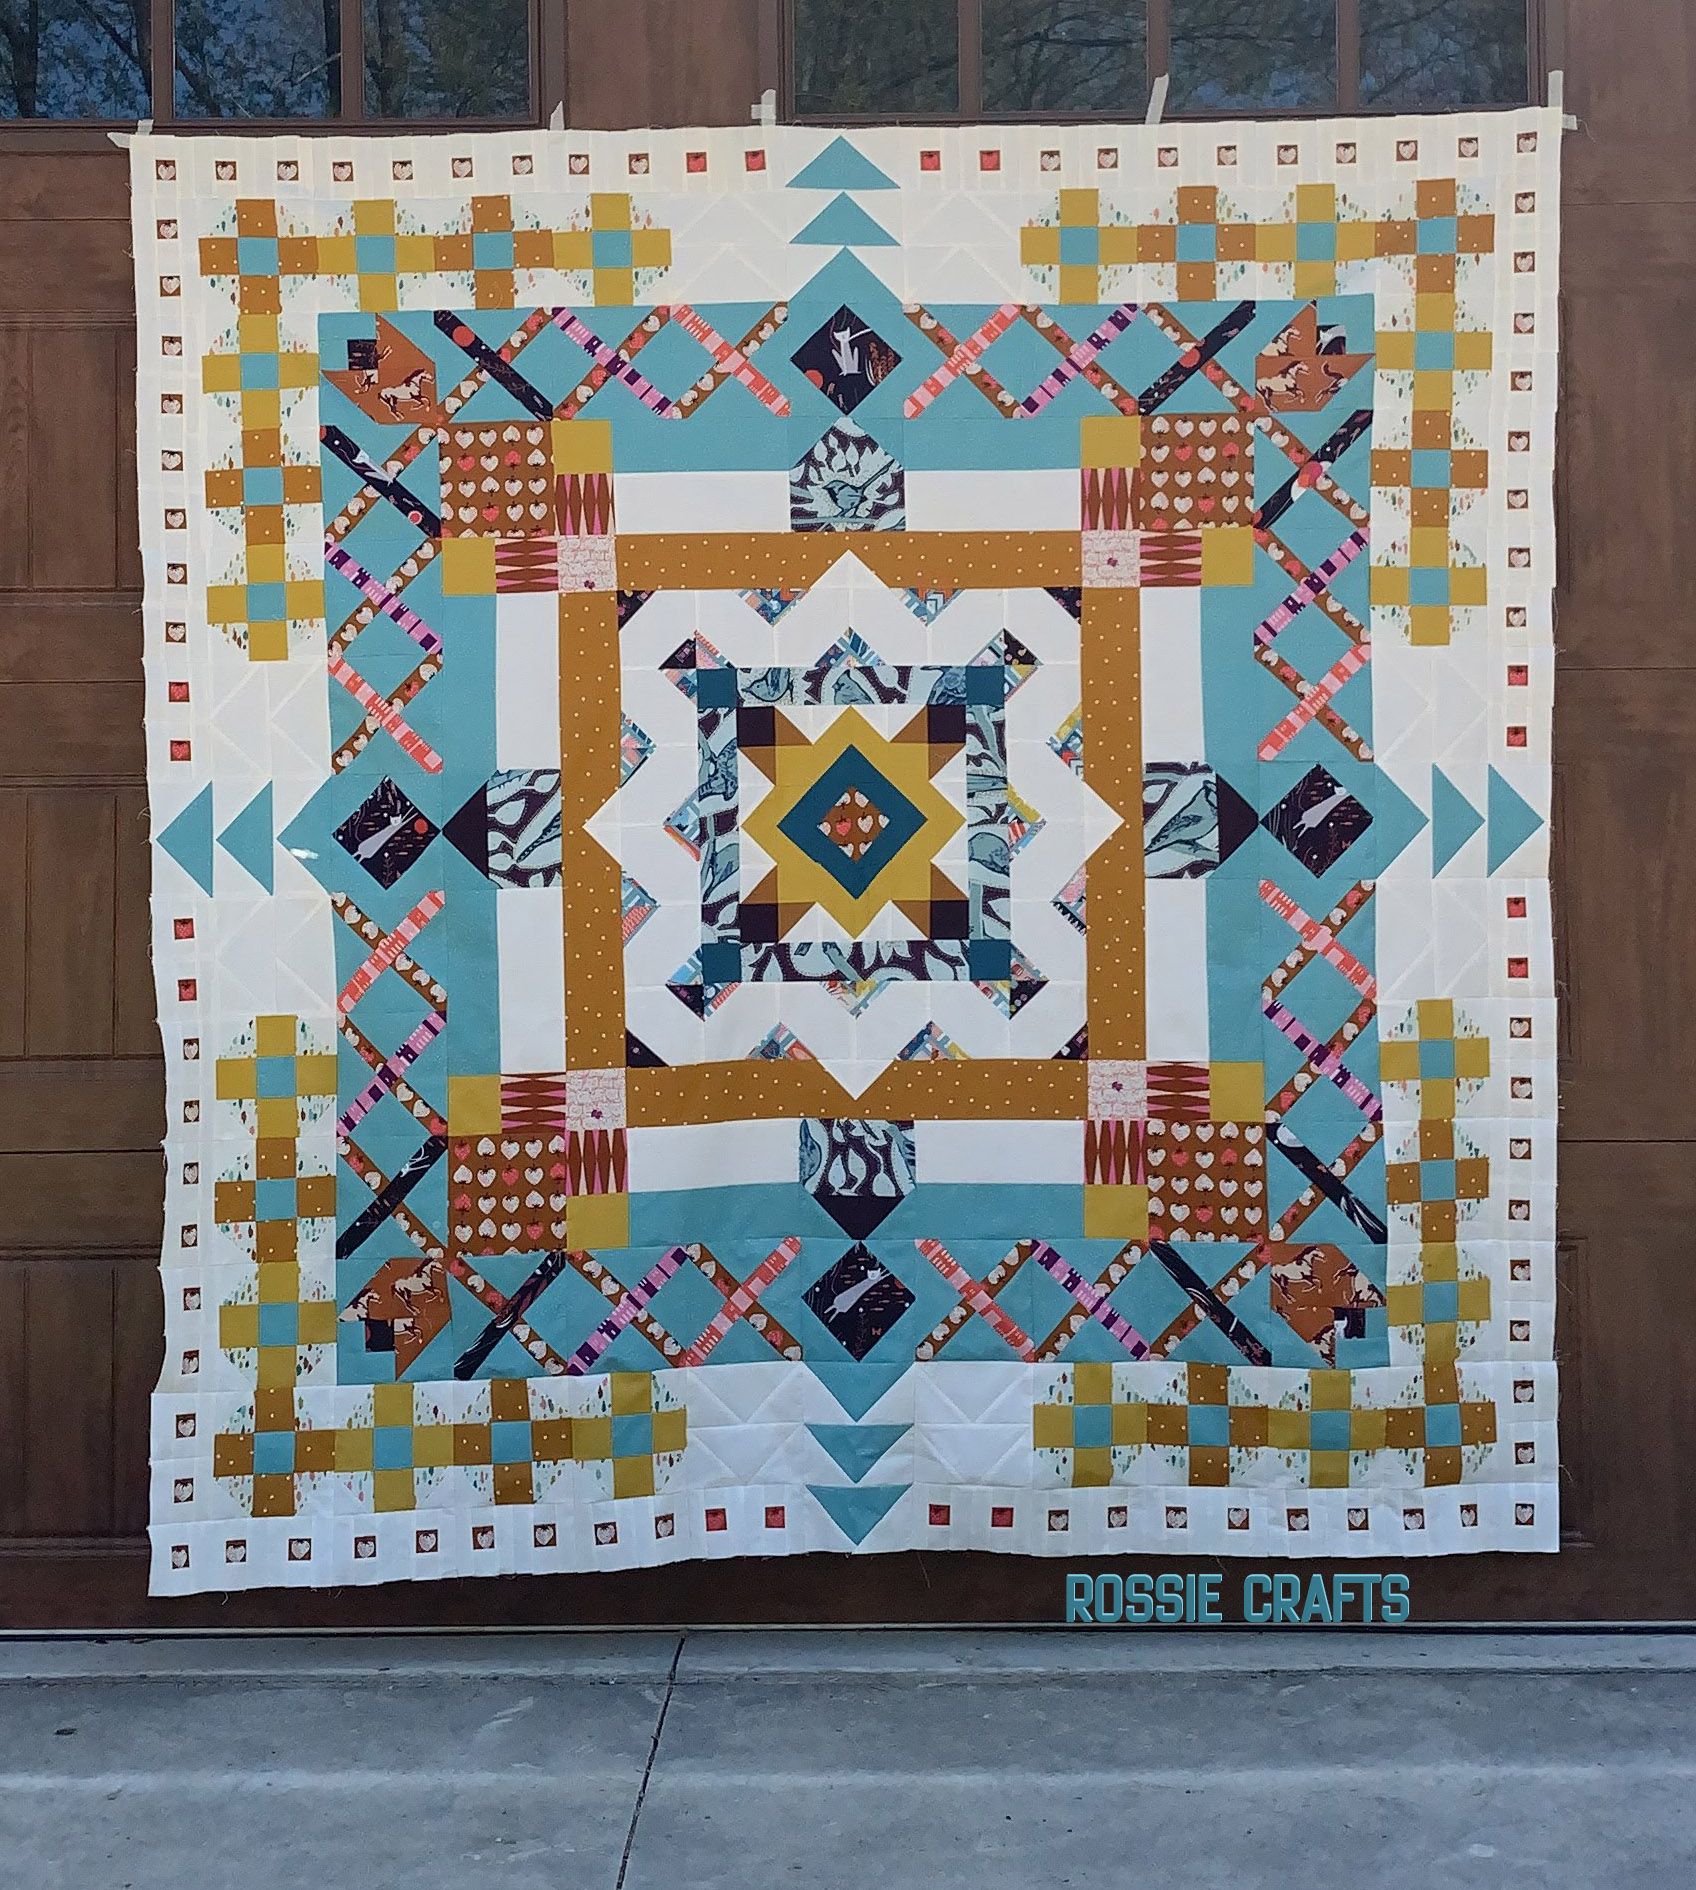
My design wall got a huge dose of awesome slapped up there today!
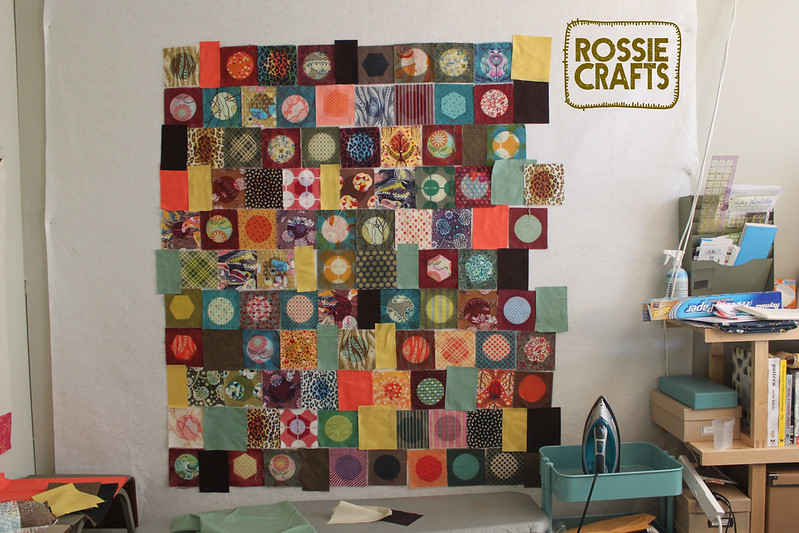
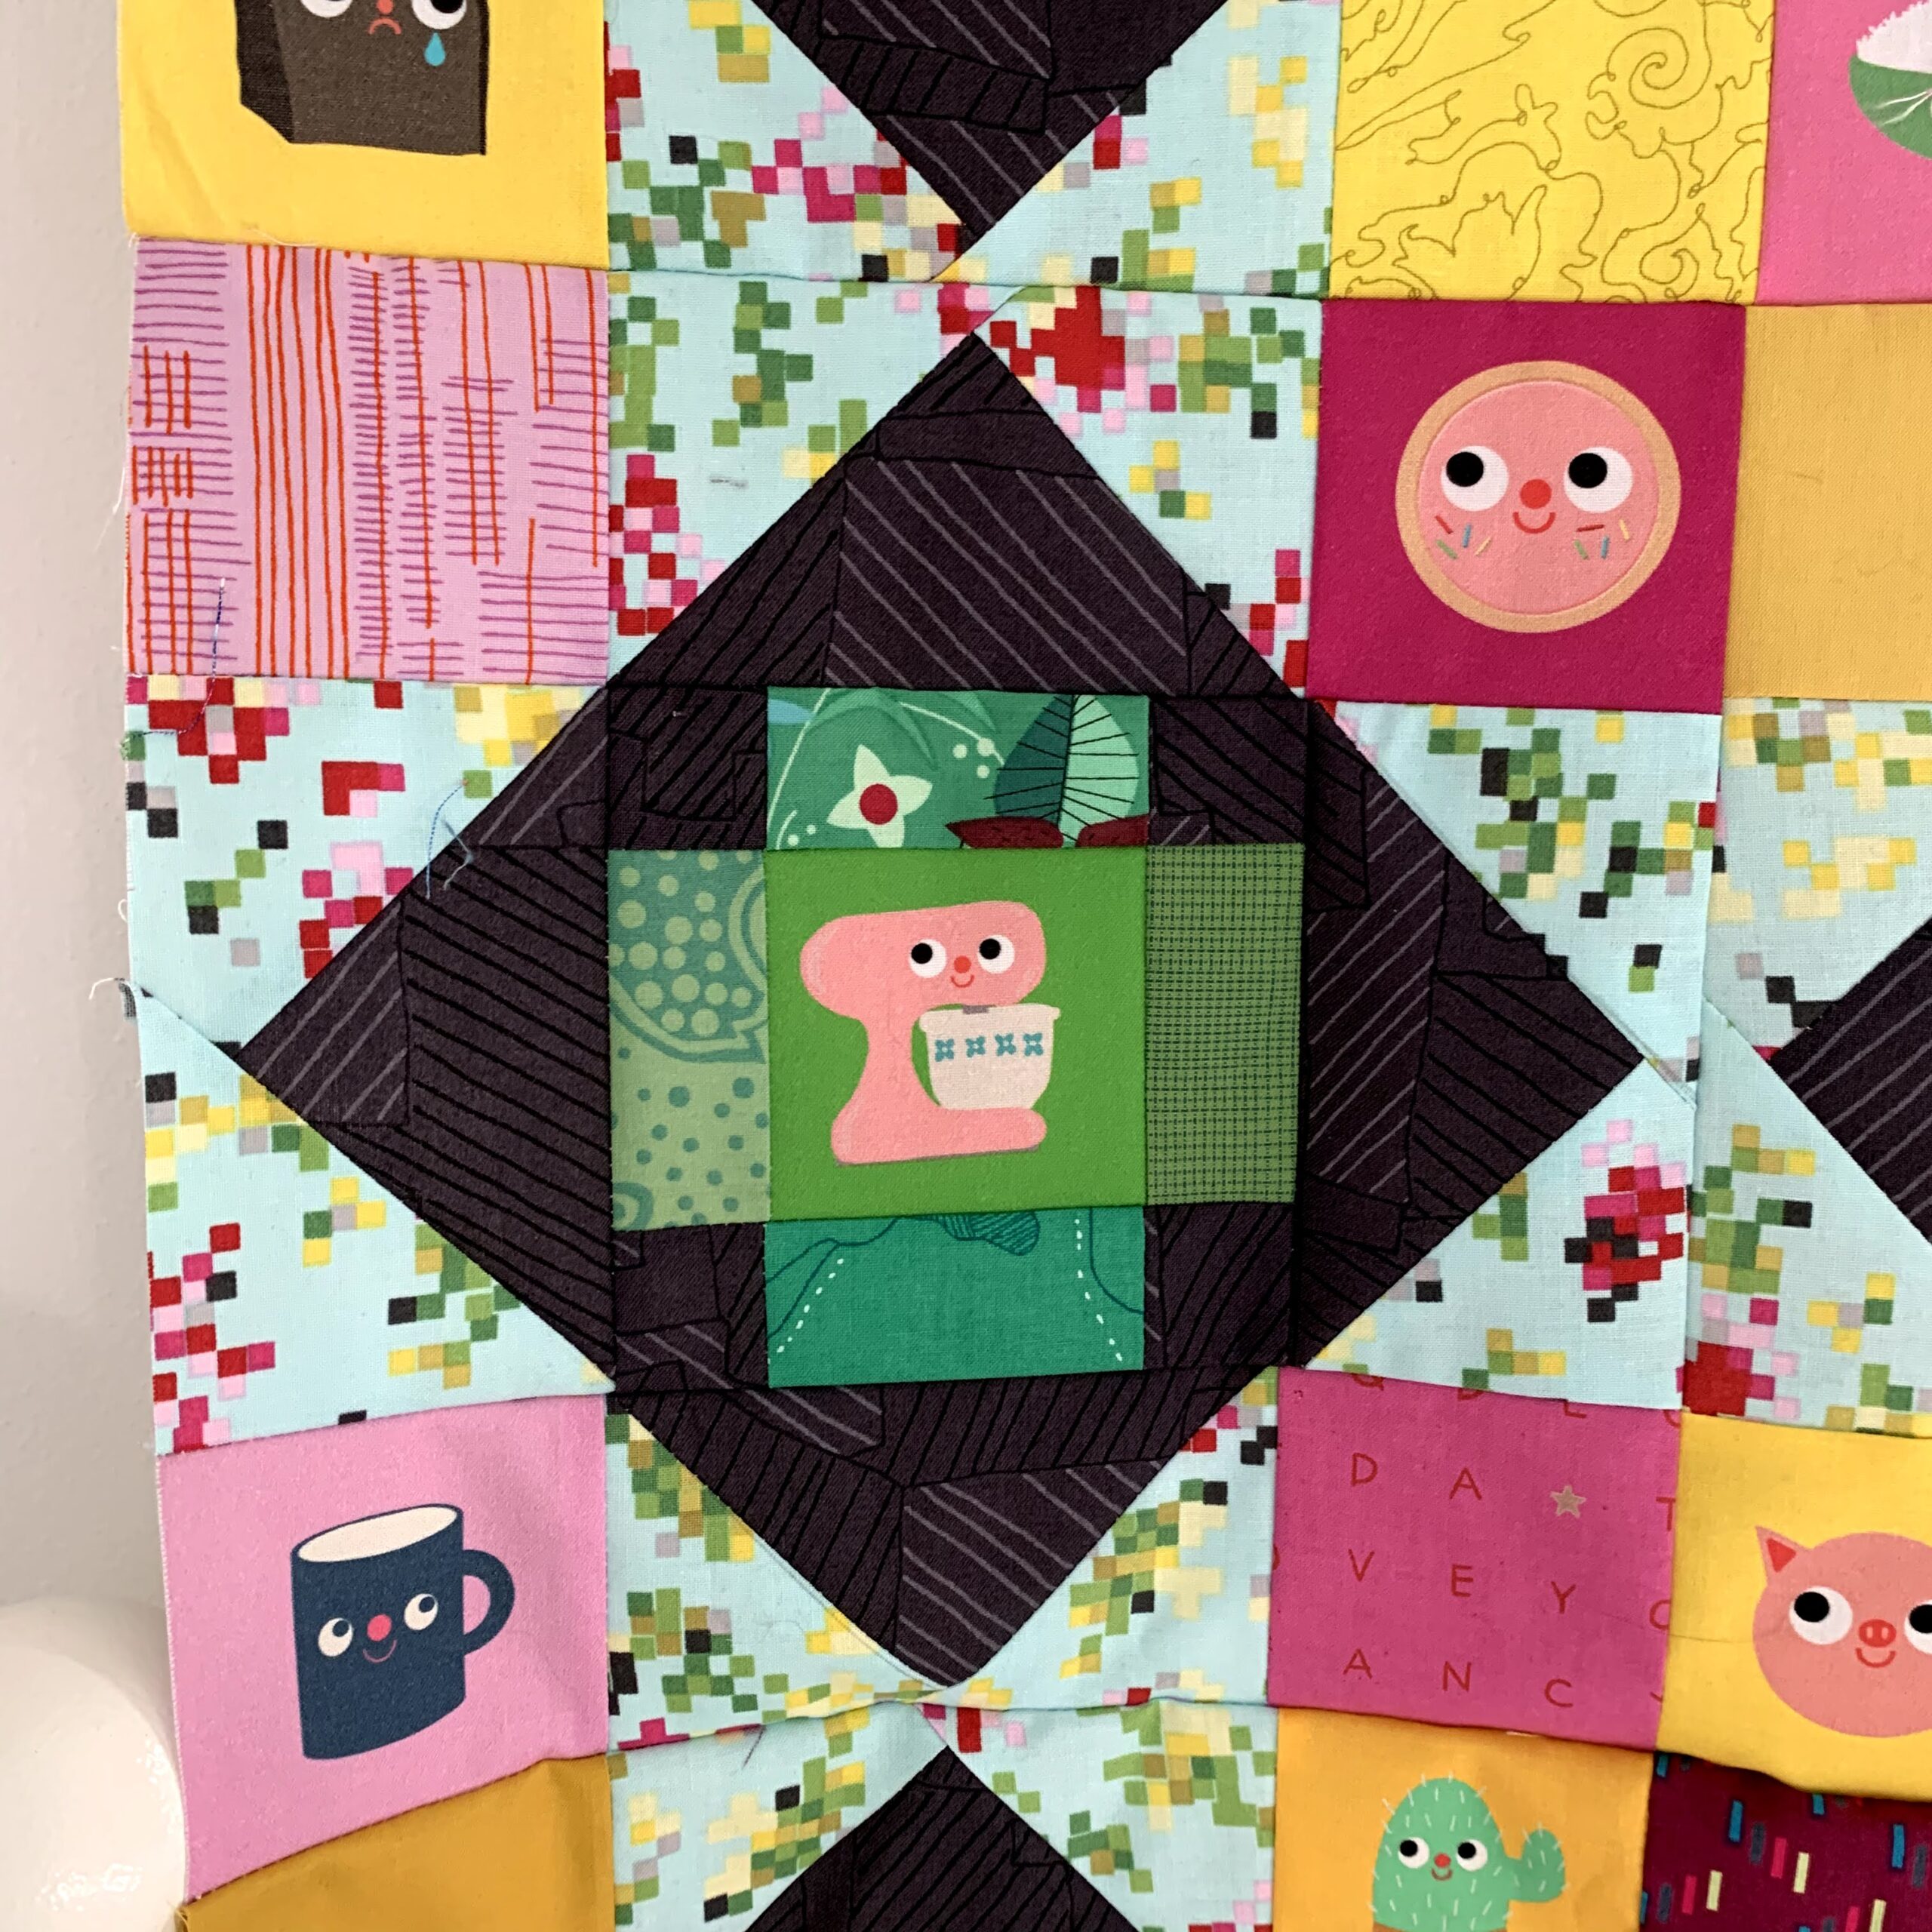
Fun, right?
These will all be sewn together to make a quilt for my cousin Kelly, who got married in October On the big day, I gave the couple a card with a sweet note and a post card for them to send back to me. The post card asks about what they might like. (I’ve done this before, you can see the results in this old post). When Kelly’s card came back, it said:
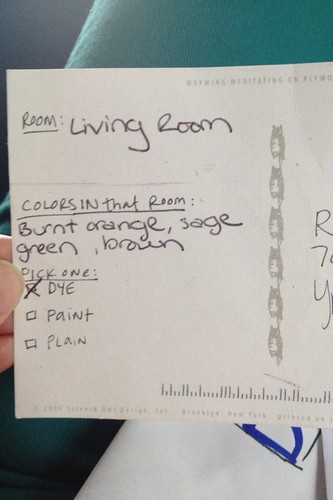
I decided to make a throw-sized quilt for Kelly’s brown, sage, and burnt orange living room.
When I saw them on sale, I snatched up some charm packs (in case you are wondering, it’s Field Study 1 by Anna Maria Horner, Birds and the Bees from Tula Pink, and Denyse Schmidt’s Chicopee.) The colors in these lines play so nicely together and I figure they will look good in Kelly’s home.
Once I had my fabric, I got down to dyeing and bleaching!
This is a process called shibori itajime.
So cool, right?
Its an ancient process that I first saw on Malka Dubrawsky’s blog and then learned some of the specifics from an article about her in Quilting Arts (December/January 2009).
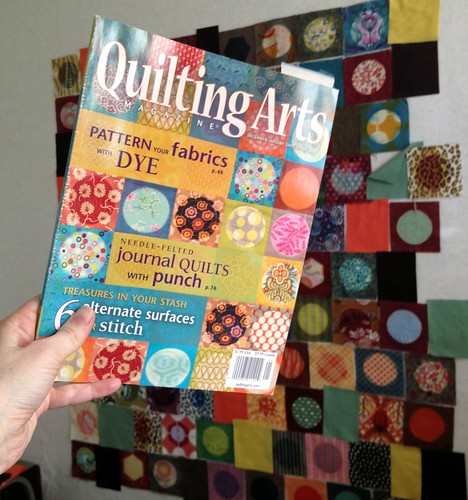
As you can see, I’ve gone straight down the path that Malka laid out for me in her cover…circles in squares is pretty hard to beat!
Of course, I did make some changes. I’ve thrown in some solids and offset the squares.
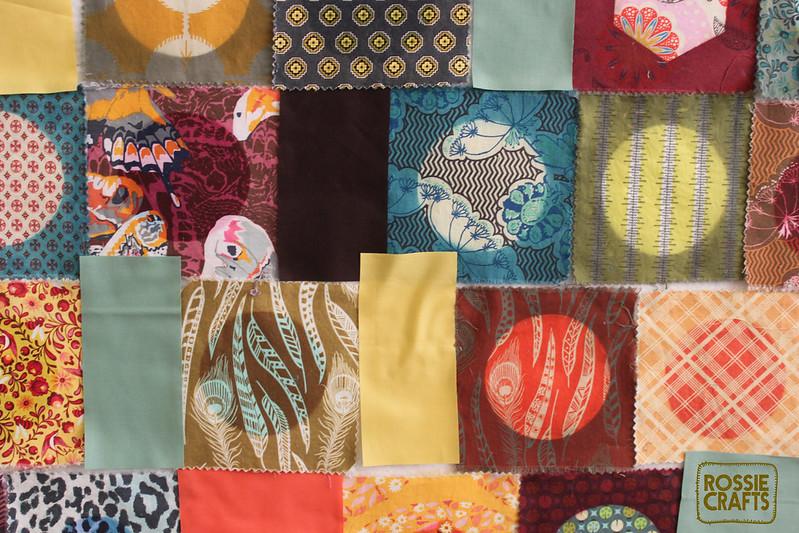
Also, some of those circles aren’t circles, they are hexagons!I
The hexagons are a new shape I’m selling in my shop.
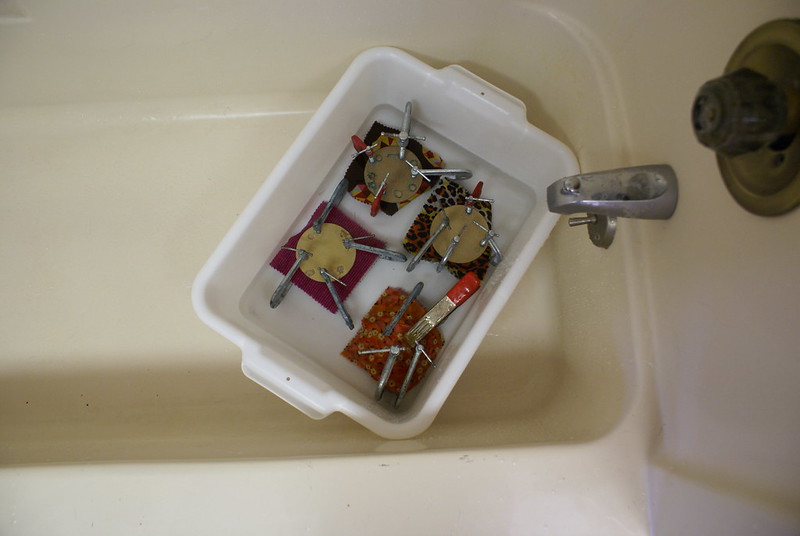
I include complete instructions with every order of my plexiglass shapes. But it’s pretty simple….
Step 1: Clamp
Step 2: Dye with fiber reactive dye (like these)
(you also need table salt and soda ash)
Step 3: Rinse
As an alternative you can…
Step 1: Clamp
Step 2: Bleach
Step 3: Stop the bleach. (with Anti-Chlor or Bleach Stop)
Step 4: Rinse
It’s magic of the best kind.
It’s fun to see what gets a strong result and what doesn’t.
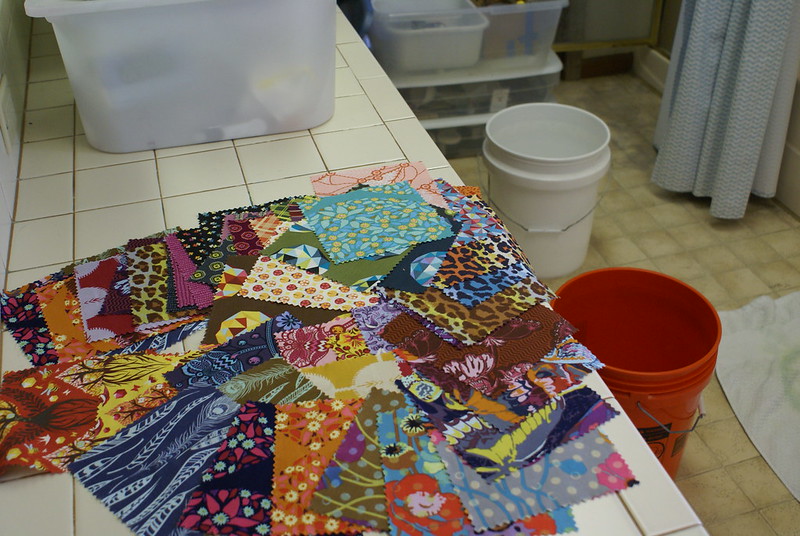
In this picture, I’ve sorted my unaltered fabrics so that the ones I plan to bleach are on the left and the ones I plan to dye on the right. Basically, I’m bleaching the dark ones and dyeing the light ones.
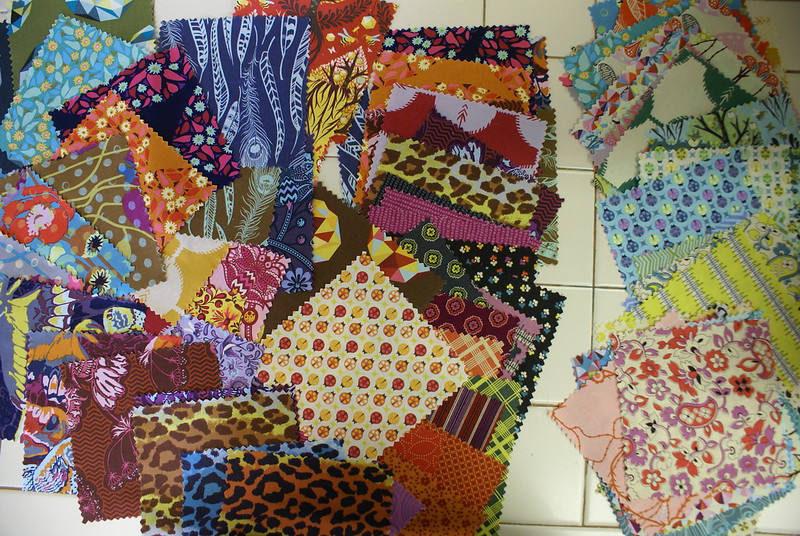
The bleach will pull a lot of color out of some fabric and hardly any out of others. In my experience, purple and blue tend not to bleach as easily, so for fabrics of medium value, I tend to bleach the red/browns and dye the blue/purples.
Dye is fun, too, as it can completely change the appearance of a familiar print as it layers a new color on top (I used three colors here: a dark gray, a berry red, and a teal blue).
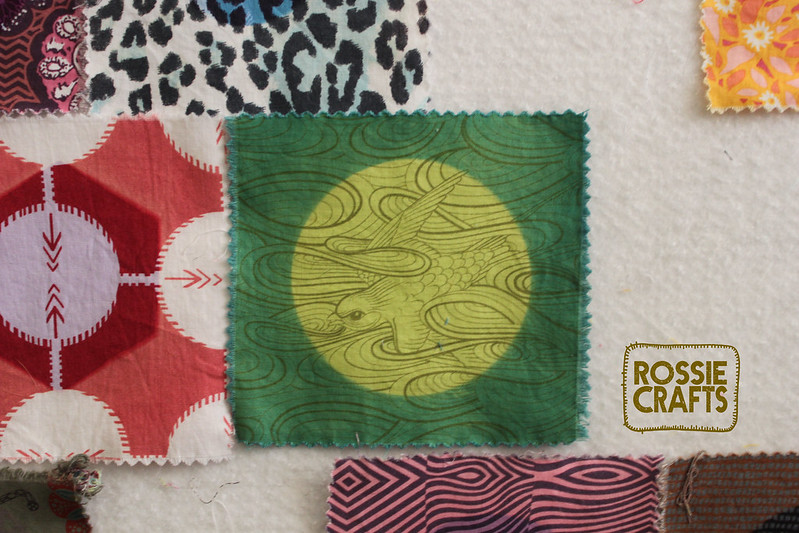
I could stare at these for hours.
Especially this bird!
Related Posts

This Post Has 35 Comments
Comments are closed.
I am in awe. I can hardly wait to see the finished results!
I can't wait either!
Totally awesome, as always! 🙂 I think I might consider stealing your note card idea… I have a good friend getting married soon and it would be fun to do something for her with some input, but without collaborating. 🙂
Thanks! And the postcard idea is great for exactly that reason…you have a reasonable chance of making something that will be liked & used, but you are not "taking orders" or going to end up doing somehitng you're not interested in!
LOVE IT, rossie! you're awesome!
Thanks!
What a truly original look!! Have to try this sometime, for sure 😉 thanks for the inspiration!
i love spreading knowledge of this technique around!
Wow! I love love love love this quilt top! I wish I was Kelly!
Seriously though – the technique is fantastic. I will have to go and research this some more!
(like I need another passion!)
It's so easy! A lotless labor than if you pieced all of it! You'll love it!
that's fantastic. I could look at it for hours too!
Thanks, dear!
Wow, so pretty. They're going to love it.
I hope so!
What a great technique!! It's turning out gorgeous ~ a little jealous I'm not Kelly 😉 Note card ~ great idea too.
Thank you!
Love this idea. I am thinking of doing something similar with some marine uniforms combined with some fabrics. Do you put several layers of fabric into each bleaching or dyeing bundle? How many layers is the "usual"?
I put three layers in each plexi sandwich. I know some people do more, but with three I get an even, sharp result without having to stir. I'd love to see what you are doung with the uniforms!
Thanks for the info. I will be sure and send you a picture.
I want to be Kelly too! Those are amazing and now I'm wanting to try this technique.
Thanks so much! The technique is so awesome and easy.
Yep, its a great idea to try out sometime. I love how this is turning out!
Thank you!
the colors are fab! the effect is great, although i would never bother with all the mess of dyeing fabric! Lucky recipients.
It's a pretty contained mess. No worse than cooking with beets. 🙂
I love the results you got! It's going to be a fabulous quilt.
Woot woot!!!!
Awesome!
I love that bird too. I ended up with one piece of the fabric in our DS class and I stare at the block constantly.
He's a good bird, for sure!
Simply beautiful!
Thank you!
Super nice! I had saved that article and wanted to try it. Thanks for showing us the way! Love the fabrics and I think it's going to be a very cherished quilt. How will they launder it in the future? Have a great week! Pam
I hope they do cherish it!
It can be laundered like any other quilt. I used fiber reactive dye which is permanent and what is used to dye fabric for the garment industry. For good measure I will probably throw a box of color catchers into the gift box and have them use them when they wash the quilt, but that's really an abundance of caution. The fabrics should all be colorfast!
fabulous!
have been loving this since i saw your quilt at Quiltcon – finally just ordered a little dye stuff from Darma and a little set of templates from your Etsy shop – can't wait to give this a try!!